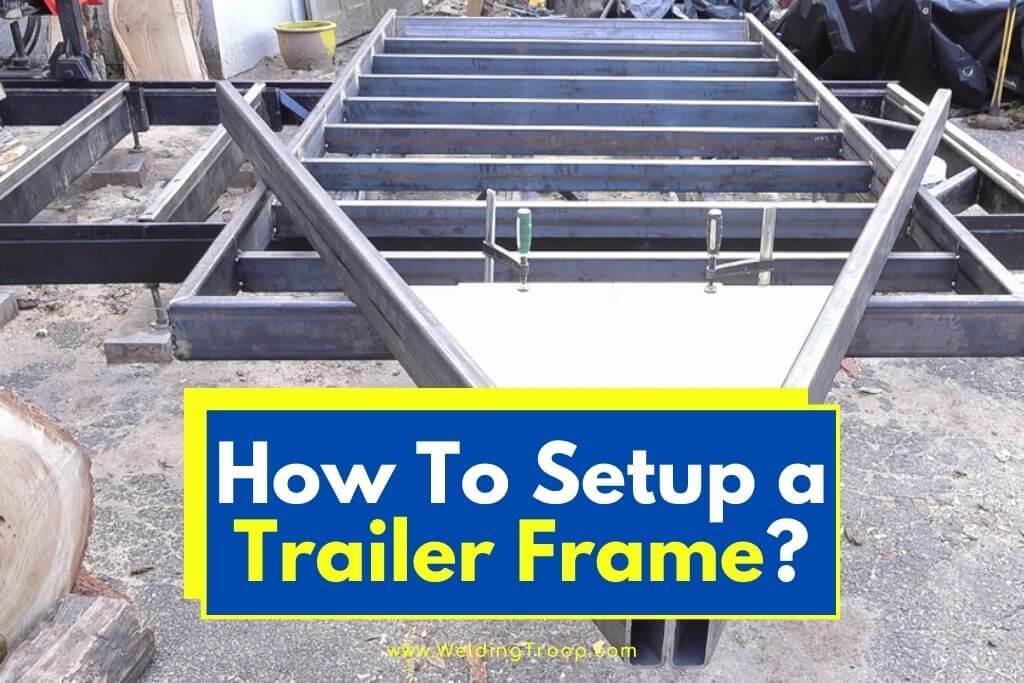
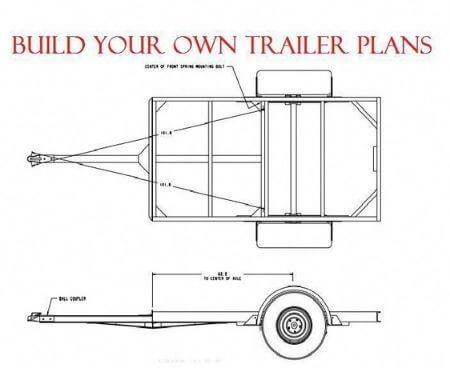
Have you ever wondered how to setup and build a trailer frame? Look no more. We´ve got you covered.
Trailers can be expensive. Therefore, it isn’t really a surprise that there are so many people out there that consider the idea of building their own trailer frames.
On this page, we want to run you through a few of the things that you need to know about building your own trailer frame.
So, how to setup and build a trailer frame? To setup and build your own trailer frame you need to follow the steps which include:
– Building the Perimeter
– Add the Support Beams
– Cutting the Trailer Tongue Beams
– Attaching the Trailer Tongue Beams
– Attaching the Trailer Tongue Hitch Connector
– Weld the Trailer Tongue Beams onto the Trailer Support
– Building the Trailer Cage
– Building the Tailgate
– Cover the Trailer in Metal Panelling
– Attaching the Axles
Do bear in mind that we are only going to be able to provide you with an overview of how you should be setting up and building a trailer frame on this page.
When you obtain a plan for your trailer frame, you should always read detailed instructions for the plan. This way, you can be sure that everything is being carried out properly.
Table of Contents
How to Setup and Build a Trailer Frame
First and foremost, you should never, ever be building a trailer frame without a plan. You can do it later on once you know what you are doing.
However, if you are new to trailer frame construction, then it is a massive ‘no’. You will get things wrong.
So, before you move on, you will need to ensure that you have sourced a decent plan for your trailer. You can think of this as ‘step one’.
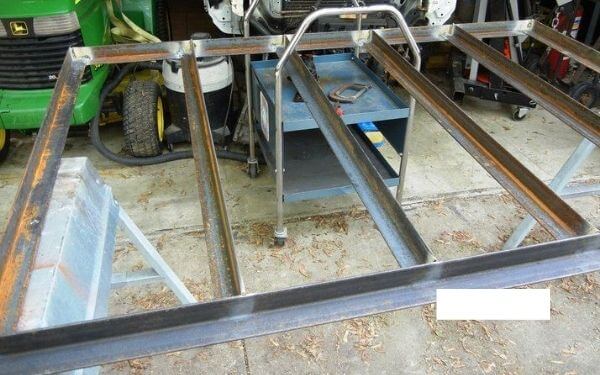
Step 1: Building the Perimeter
The first step in any trailer build is building the perimeter. These are the four outside parts of the trailer. These will often be rather hefty pieces of metal.
Again, make sure that you check the trailer plan here.
At the end of each of the perimeter pieces of metal, cut a 45-degree angle. This will allow you to slot everything together.
When everything is slotted together, weld it all up. Make sure that there is no slippage here. You don’t want your trailer chassis to become misaligned.
Step 2: Add the Support Beams
You can now cut up some support beams that stretch across the width of the trailer.
In theory, you can use as many support beams as you like. However, this is just going to add additional weight to the trailer. We suggest that, instead, you cut up two of them.
The support beams should be a fairly snug fit, so make sure that you measure them exactly.
The best placement for the support beams will be about a quarter of the way up from each side of the trailer. Again, measure this exactly.
Once you have slotted the support beams into place, you can weld them.
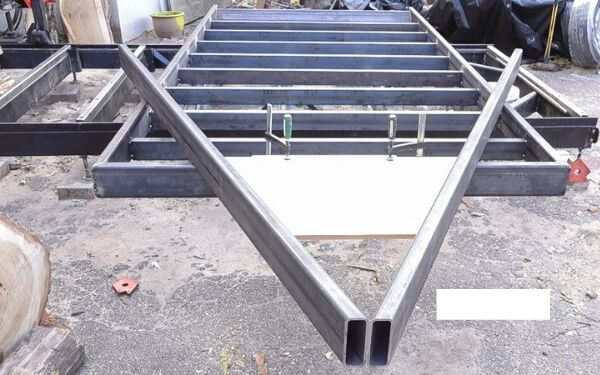
Step 3: Cutting the Trailer Tongue Beams
You need two pieces of metal for the trailer tongue. Once again, this should be the same metal that you used for the rest of the trailer.
Each piece of metal should be 4.5-feet in length. Do not make it any shorter than this otherwise the trailer will not have enough clearance when the vehicle turns.
Frame & Tongue Layout – Urban Logging Trailer Build >> Check out the video below:
Step 4: Attaching the Trailer Tongue Beams
This is where you will need to consult the plans that you are using to build your trailer. This is because the way in which you attach the trailer tongue to the support beams of your trailer will vary.
In most cases, you will need to cut out various notches on the support beams and the tongue beams. The plans should give you the exact pattern for this.
The plans should also go into a lot of depth on the best places for you to attach the trailer tongue to the trailer chassis support.
Step 5: Attaching the Trailer Tongue Hitch Connector
This is something that you will need to buy yourself. You cannot make a trailer tongue hitch connector.
The trailer tongue will, of course, need to fit in between the two pieces of metal that you cut to support the tongue.
You will need to cut out even more notches on these to accept the trailer tongue. Again, you will need to consult the plans for your trailer to know exactly what you should be cutting here.
The trailer tongue will need to be screwed into place. You should not be welding it. If you do, then it is going to weaken the steel.
Since the tongue is going to be bouncing up and down quite a bit, if the steel is weakened, then your trailer just isn’t going to work properly.
Read also: Trailer Wiring Diagrams:19 Tips Towing Electrical Wiring Installation
Step 6: Weld the Trailer Tongue Beams onto the Trailer Support
You will now need to go back and weld the trailer tongue beams onto the trailer support. It is important that this is a solid weld.
If it isn’t, then the tongue could end up falling off mid-drive.
Step 7: Building the Trailer Cage
This part should be dead simple. You are just building a metal box on top of the trailer frame.
You will need to start with four support beams that are the height that you want the trailer to be. These will need to be attached to the corners of the trailer support and pointing up.
You will then need to build a metal frame to attach to these. This should be the same size as the base of the trailer.
However, you will not need to add support beams in the center. If you did, then you wouldn’t actually be able to add anything into your trailer.
Weld everything together.
Step 8: Building the Tailgate
You will now need to build a door for the back of the vehicle. This is your tailgate.
You will need to build a metal rectangle that fits inside of the back beams.
Do not weld this into place, though. Instead, you will need to connect one side with strong door hinges. The opposite side should be a lock of some description.
Step 9: Cover the Trailer in Metal Panelling
Now you need to get metal panels (sometimes called metal mesh) and cut them to size. You will want to ensure that every open side of the trailer is covered in this metal paneling.
You can use plywood to line the bottom of the trailer. However, we do not recommend that you do that. The problem with plywood is that it is weak.
This means that your trailer is going to have a rather paltry towing limit.
You should use bolts or screws to hold the paneling in place. You should not be welding it into place. It weakens the frame even more.
Step 10: Attaching the Axles
The final step is to attach the axles and wheels to your vehicle.
Again, you will not be able to build your own axles. Well, not if you are new to building trailers, at least. You can purchase quality axles online.
It is important that you check the maximum weight for any axles that you do buy to ensure that they are up to the job. You will also want to ensure that the axles are rated for use on the road.
With the axles, you will receive some clasps. It is these claps that you use to attach the axles to the frame. Follow the instructions in the manual for your axles if you are not sure what you need to do.
The final job is to attach the wheels to the axles. Once this is done, you are ready to roll.
We suggest that you test out the trailer frame on the road before you start loading it up with weights. This way you can be sure that it isn’t just going to fall apart.
How to Build a Trailer Frame Without Welding?
It is suggested that you do build a trailer frame without the use of a welder. However, if you absolutely do not want to carry out any welding on your trailer frame, then you do have one option available to you.
This is to use a combination of bolts and angled metal brackets to join the trailer together.
Surprisingly, this is going to be a lot more effort than just using a welder to connect everything up. This is because, for each bracket that you attach, you will need to drill several holes.
These holes need to be the exact right size for the bolts otherwise everything is going to be shaking loose.
If you are attempting to build a trailer frame without welding, then do make sure that you regularly inspect the bolts on the trailer.
They can come loose over time which, of course, can end up causing your trailer to fall apart. We are sure that you do not want this to happen right out there on the road, do you?
How to build a trailer frame without welding >> Check out the video below:
Trailer Frame Steel Thickness
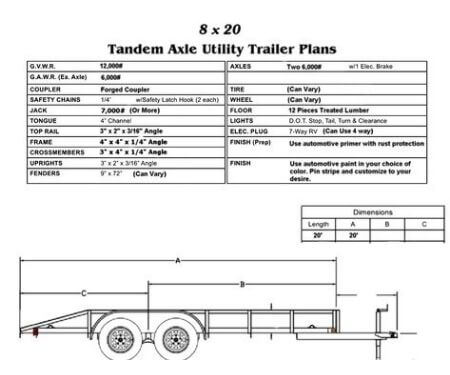
Any trailer plans that you do follow should tell you exactly the width of trailer frame steel that you need to be using. In most cases, it is going to be 2″ x 4″ x 1/8″ rectangular steel.
We wouldn’t really go below this.
If you do, then there is a chance that your trailer frame won’t be able to support the weight that you want it to be able to support which, of course, is never going to be a good thing!
Remember, steel is tough, but it is only tough when it has a decent amount of thickness behind it.
Trailer Frame Material
First and foremost, you should never use wood when you are building a trailer frame chassis. We know that there are some people out there that will use wood. It is cheap, after all.
The problem is that wood isn’t that strong at all. It is going to break sooner rather than later.
This means that when you are searching for material for a trailer frame chassis, it should always be metal.
Aluminum
Most people nowadays build their trailers out of aluminum. This is because the trailer is going to be outside quite a bit, and aluminum is pretty decent at keeping rust at bay.
However, you do need to make sure that the aluminum is treated properly. Never use ‘raw’ aluminum without a protective coating.
Aluminum also has the benefit of being incredibly lightweight, while also fairly tough. This means that it can carry a rather sizeable amount of weight.
The only major downside to aluminum is the fact that it is very, very expensive to buy.
Aluminum Alloy
Aluminum Alloy is much the same as aluminum. However, it is a bit tougher and more rust-resistant as it has a few extra metals mixed into it.
However, do bear in mind that aluminum alloy is going to be more expensive than aluminum.
Steel
Steel is going to be the cheapest metal that you can purchase for your trailer. It is also going to be the toughest and strongest material to purchase for your trailer.
So, if you want to build a trailer chassis that is going to last, then steel is going to be the route to go down.
The major downside is that steel is going to be a lot heavier than any of the other materials. It also rusts if you do not treat it properly.
If you do buy steel, then we highly recommend that you use galvanized steel for your project.
Trailer Frame Chassis
As we said before, if you are planning on building a trailer frame chassis, it is important that you use a plan for the chassis.
You should never plan your own chassis because there is a chance that you will not be reinforcing the trailer frame in the right places.
When you are searching for a trailer frame chassis plan, you do need to make sure that you obtain the frame plan from a reputable resource.
Do not just pick up a random plan online. Make sure that the one that you choose has been highly tested.
If there are pictures of the plan in action or being built, then you know that the trailer frame plan has gone beyond the theoretical side of things.
Don’t forget to also consider the amount of weight that you are planning to carry when you build your trailer frame chassis.
Plans should tell you roughly how much weight the chassis can carry. However, do bear in mind that this figure can vary a little bit depending on what materials you are planning on using.
DIY Trailer Plans and Blueprints
Below you can finds some trailer plans and blueprints:
Build Your Own Trailer Kit
Homemade Utility Trailer (Build Your Own Trailer Kit) >> Check out the video below:
Trailer Frame Setting FAQs
Let’s close out this page about how to set up and build a trailer Frame with answers to some of your most frequently-asked questions about them!
How do you stiffen a trailer frame?
A process call ‘sistering’ is the best option for stiffening a trailer frame. With this method, you will, essentially, be bolting some more steel onto the trailer frame. You are doubling up on the metal.
This will help to stiffen the trailer up a lot. If you have built the trailer from wood, then you can use the same process by doubling up on the wood.
What kind of welder do I need to build a trailer?
Most people prefer using a stick welder if they are building a trailer. However, you shouldn’t really have any issues if you opt to use a MIG welder instead.
The main reason why people prefer stick welders is that they are a little bit simpler to use.
Where should you not weld on a trailer?
You should not weld anywhere on the trailer that is going to be coming under a lot of stress due to the weight.
The one area that people recommend that you absolutely never weld on a trailer will be the tongue of the trailer.
If you weld here, the steel will be weakened. This means that, sooner or later, the tongue of the trailer is going to fail.
Read also: Does Welding a Vehicle or a Truck Frame Weaken It? Is It Safe?
How do you certify a homemade trailer?
When you are building your trailer, you need to keep receipts for the materials and components that you have used in the construction.
To certify a homemade trailer, you then need to take the trailer to a certified weigh station to be weighed. Once you have this information to hand, you need to head to the DMV and fill in some forms. You will then be granted the title to your trailer.
It will now be fully certified.
How can I increase the capacity of my trailer?
Increasing the capacity of your trailer will involve strengthening every area of the trailer.
You will need to pay special attention to the axles and wheels of the trailer. You can also add additional beams to the frame of the trailer to help increase the strength.
How can I make my trailer higher?
Putting the suspension above the axles is probably the best way to increase the height of your trailer.
Alternatively, you can just get some larger wheels. These will add a couple of inches to the height.
Conclusion
Remember, this is just an overview of how you should be setting up and building a trailer frame.
We do suggest that you do a bit more research if you are planning to tackle the project yourself.
This includes trying to find some plans for your trailer frame. This will help to ensure that everything is built perfectly.
Don’t forget that you need to keep the receipts for your materials if you plan on registering the trailer with the DMV!
References
https://www.instructables.com/A-Homemade-Trailer-That-Is-Bolted-Together/
https://www.wikihow.com/Build-Trailers
Here are some of my favorite tools & equipment´s
Thank you for reading this article. I hope it helps you find the most recent and accurate information for your welding project. Here are some tools that I use daily and hope you´ll also find helpful.
There are affiliate links, so if you do decide to use any of them, I´ll earn a small commission. But in all honesty, these are the exact tools that I use and recommend to everyone, even my own family. (NO CRAP)
To see all my of most up-to-date recommendations, check out this resource that I made for you!