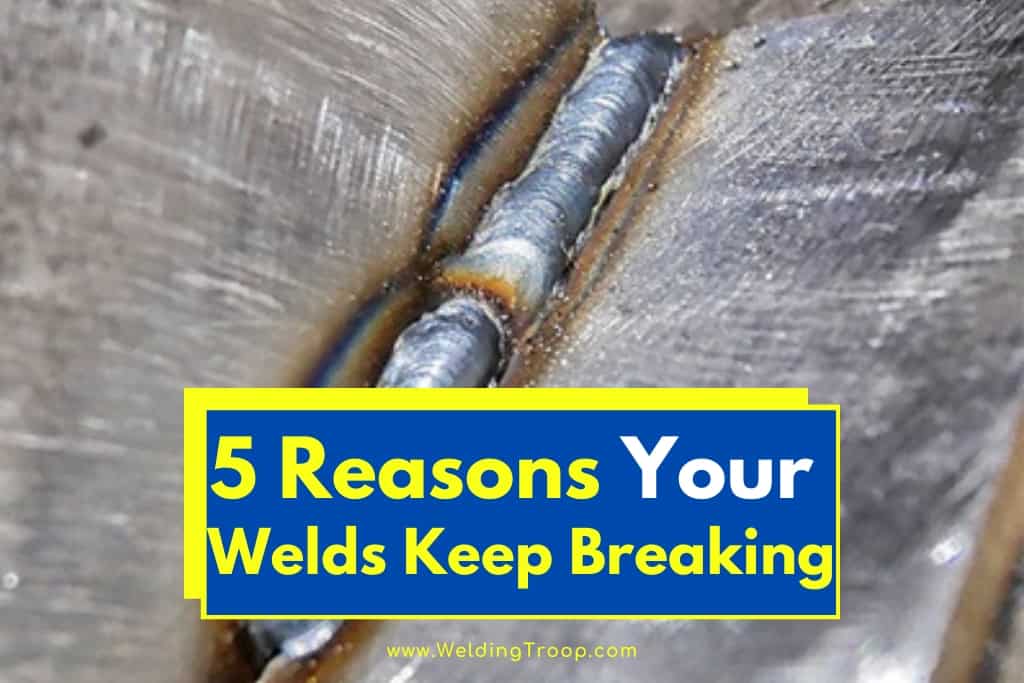
To state that welding is a pain-staking occupation may be an understatement. Every detail ranging from the material, tools, temperature, incubation time, etc. must be meticulously consistent. If not, you run the risk of compromising the integrity of the weld. This will not only put your reputation in jeopardy but can put lives at risk, depending on the product. As a result, we must practice extreme vigilance during the process. But sometimes, we run into weld breaks that will baffle us.
Why does your weld keep breaking? We’ve compiled a list of 5 reasons why your welds keep breaking:
- Insufficient Welding Temperature
- Stress Built Up from Rapid Cooling
- Welding with Faulty Equipment
- Neglect to Account for Oxidation
- Insufficient Cleaning
In a career where a bad weld can make or break a product, asking for assistance is a difficult thing to admit. But with any other technical skill, mastery comes as a result of practice and guidance. Without making a mistake, we would never have the opportunity to evolve our craft. As we like to point out, obstacles are a way for us to improve. Without it, we would hit a lull and experience a sense of plateau. Best to rough out the edges now, wouldn’t you agree?
Table of Contents
Why Do Welds Break?
One of the most underappreciated aspects of an industrial product is the quality of the weld. Without quality welding, the integrity of the entire product can be compromised. To quickly recap, welding is the act of uniting two or more metal parts via melting the metals and fusing them.
The process is heavily dictated by the type and thickness of the joining materials. Modern advancements have streamlined the techniques at the cost of welders, forgetting the essential steps during the process.

As we will soon demonstrate, weld breaks are the result of many different problems. Regardless of the cause, the breaks will not be tolerated in the grand scheme of things. With that in mind, let’s break down how these 5 reasons can impair your weld and how to remedy those mistakes.
1. Insufficient Welding Temperature
For the welding of materials such as steel and metal, welders must safely perform their tasks using incredibly high temperatures. Welders are known for using tools that range from 5,000 to 35,000 degrees Fahrenheit. A strong weld is a result of using the correct welding temperature to initiate the melting/fusion process.
Similar to a certain children’s bedtime story, we need to find a temperature that’s just right for the process. Welding at either too high or low temperatures will compromise the integrity of the weld. Let’s quickly examine the ramifications of both scenarios.
When welding at extreme temperatures, you run the risk of creating small pores along the joints. Metal naturally becomes brittle when exposed to high temperatures. That’s why you need to be vigilant with the amount of heat applied. The small pores within the gap will compromise the integrity of the weld over time.
The same can be stated for welding at lower temperatures, those below the melting temperature. A hot metal trying to weld with a colder metal will result in a complete disaster. The notion also applies when both metals are vastly colder than the heat generated by the electric arc. A weak weld will form as a result. Some easily noticed when completed (instant formation of a crack), some witnessed over time.
To prevent this issue, welders will tend to preheat the base material before applying the melting temperature. This is vital as it helps to lessen the stresses associated with metal shrinkage. Remember, a hot material will expand while a cooler one will contract. The preheat can be accomplished by either using the open flame from a torch or placing the metal in an oven or furnace. Just be sure to monitor the rising temperatures, so it doesn’t exceed the desire melting temperature.
2. Stress Built Up from Rapid Cooling
Cracking is the most common defect that occurs in the welding process. In this instance, we’ll examine this phenomenon in terms of inefficient or rapid cooling. At the joint, rising heat of the weld results in an increase of thermal stresses. If the built-up stress is released too rapidly, the stress will cause a crack. By industrial stands, this is the worst defect to witness.
To prevent this defect, the metal should be annealed. This treatment occurs by heating the weld again after fusion, aiming for a lower temperature than the metal’s melting temperature. Similar to preheating, the material can be reheated using a torch or a furnace. If the option is available, we advocate the use of a furnace. It gives you total control over the entire procedure while allowing you to walk away and work on other projects.
Once you reach the appropriate range, somewhere in the range of 1450 to 1650 , you’ll incubate the metal for a set time. A good rule of thumb is to soak the metal for one hour for every inch of thickness [Source]. If the metal’s thickness is inconsistent, then base the incubation temperature on the thickest section.
Since the oven allows us total control for heating, it delivers the same liberty towards the cool down process. This can be achieved by simply letting the weld cool naturally or set a cooldown rate. Overall, the process enables the joint to purge internal stress (“blow off steam”) in a controlled manner. This results in a weld with increased ductility and reduced hardness, allowing you to cut or shape the metal as you see fit.
3. Welding with Faulty Equipment
An artisan is only limited by the tools at hand. Welders are one such artisan where faulty equipment can dictate the quality of the weld. If every component in the system is working in perfect unionism, we should form a perfect well.
For all extensive purposes, we’ll go over a few issues that can arise from a Metal Inert Gas (MIG) welding. While considered to be one of the easiest welding methods to perform, the rig can still offer complications that will cause you to restart from scratch.
The contact tip of your weld gun will form your contact point with the metal. The contact tip will spew out an electric arc, where the heat is high enough to melt and fuse the two metals. In some instances, weld forms at the contact tip, causing burn back. Now the cause may vary: the gun was held to close to the metal, or the wire is fed energy too slowly. Either case, you will need to replace the contact tip and increase the feed speed.
Related reading: MIG Welding Contact Tip Thread Size – Chart And Users Guide
On the other side of things, an excess feed speed will cause molten metal to spatter alongside the bead. Not only does this affect the appearance of the weld, but it can lead to incomplete fusion. Even the most keened-eye expert will fail to notice this inconsistency. As a result, we advocate you constantly adjust the feed rate during the entirety of the process.
4. Neglect to Account for Oxidation
When exposed to oxygen and an electrolyte, all metals will oxidize. This observation is especially true for hot metals. The oxidation reaction will result in the formation of an oxide layer on the metal’s surface. This layer will diminish the metal’s natural resistance to corrosion. Over time, we will be able to see visible defects across the weld.
There are many approaches to prevent oxidation from occurring. Most experts will utilize a technique known as weld purging, the removal of oxygen, and other ion gases during and after the welding process.
To accomplish this, the metals are exposed to inert gases like Argon or Helium. Inert gases demonstrate non-reactive properties. As a result, they are used in the prevention of undesirable chemical reactions, i.e., oxidation. In essence, we’re fighting fire with fire.
The purging process is not limited to only inert gases. Many technicians have used a flux rode, imbedded with carbon gas inside. The carbon will bond with the oxygen, preventing oxidation from occurring on the metal.
In either instance, you must introduce the gas slowly. Each gas has a different diffusion rate, which will vary the purging process. For Argon, heavier than air, you will want to introduce the gas at the bottom and let it diffuse upward. On the other hand, a lighter gas like Helium will start at the top and move downward. Either case, a purge monitor should be used to measure the readings.
5. Insufficient Cleaning
When building quality, we must utilize quality material. No alchemy can easily turn coal into a diamond. This mentality is applicable during the welding process. By welding two dirty metals, you’re introducing contaminants. Rust, paint, dirt, all these contaminants will result in a fusion that lacks uniformity and cause bubble-filled pores across the weld (Porosity). These factors will create a weld lacking in strength.
Before you start welding, you should clean the surface of the working metals. Here’s a quick list of some tools you can use to restore your metal to near pristine condition:
- Sandpaper: This tool is perfect for quickly removing rust and paint. Since we are aiming to keep the metal scratch-free, we recommend using a finer grit, somewhere between 320 and 1,000. Coarser grit will get the job done faster, at the expense of roughing up the surface. If this fails, you can attempt to use abrasive blasting. This technique is common in industrial settings that require advanced cleans.
- Wire Brush: One of the easiest cleaning methods, especially when targeting those odd angles and grooves. Be mindful of what type of wire brush will work best for different metals. For example, a stainless-steel wire brush works best on aluminum metal but not iron. Iron requires a carbon steel wire brush to clean out the impurities.
- Angle Grinder: This tool is ideal for removing big contaminants on thicker metals. We point out the thickness due in part that the grinder will shred off more material than desired. If cleaning a thinner surface metal, you run of risk of ruining the metal before it can be welded.
How to Prevent Welds from Breaking
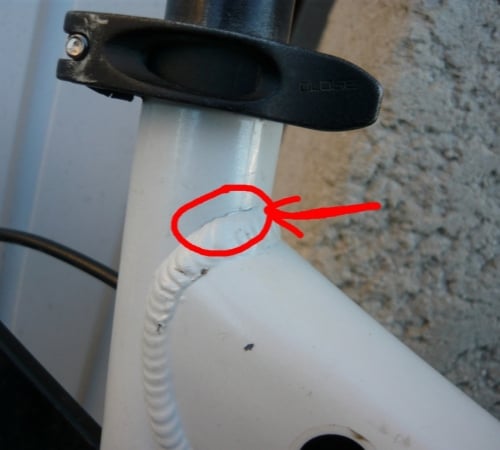
Weld breaking is an inevitability as you begin to experiment with your technician skills. Fixing these welds is often easier said than done. Some cracks can be gouged out to repair the weld. But you’ll find this isn’t usually allowed under industrial standards. In most cases, the task will need to be redone. The weld will be labeled either good or bad. There can’t be anything in between.
With this in mind, weld breaking preventions should be taken before and after the welding process is completed. In the previous section, we spent a considerable amount of time discussing how to prevent breaking before and during the weld. Not so much about how to maintain the weld to prevent future fractures.
Let’s spend the rest of this piece, breaking down the few industrial methods taken to examine the quality of the end product. By the end, you should be able to unbiasedly judge the product yourself.
Nondestructive Testing
Nondestructive testing (NDT), as the name suggests, is the approach of evaluating the weld quality without damaging it. This approach is highly favorable as it saves time and resources that would be allocated if the product was damaged.
During the inspection process, there are 5 basic methods used to examine the finished welds:
- Visual Inspection: While the easiest method of inspection, it is also the one most prone to human error. Also referred to as the only “productive” type of inspection, this method can be applied before, during, and after the welding process. The downside is the fact that only surface defects can be detected. As a result, we miss any internal defects that can only be measured using more sophisticated testing.
- Magnetic Particle Inspection: Used primarily with ferromagnetic materials (cobalt, iron, etc.), this process can detect surface and subsurface flaws. To pinpoint these flaws, a magnetic current is placed on the material where any defects will cause the current to spread out from them. Once the current is placed, magnetic powder is spread across the surface. Due to the displaced magnetism, the defects will draw in the powder.
- Ultrasonic: The most thorough method, yet the most expensive. This method utilizes high-frequency sound waves to penetrate the product. A receiver is needed to pick up the sound waves, which can be analyzed for defects undetectable from the other methods. The only defect this method has trouble testing is porosity, as the pore acts as reflectors for the sound waves.
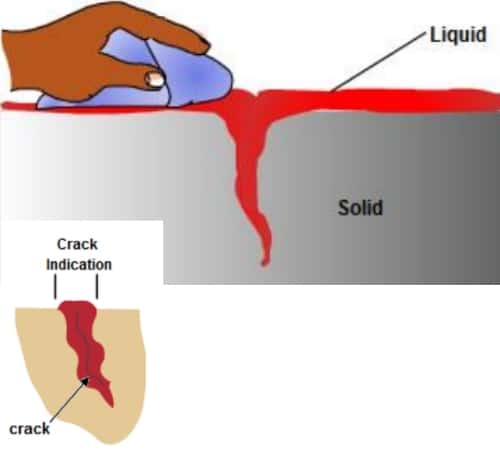
- Liquid Penetrant: Based on the principles of capillary action, the surface is exposed to a colored or fluorescent dye. If there any openings on the surface, the liquid dye is drawn into it. A developer is then used to draw the dye back to the surface, where the investigator uses a UV light to analyze the color. Similar to visual inspection, both are only able to detect surface defects. This method is also best used to located leaks in welded steels and nonferrous materials.
- Radiographic: This principle utilizes X-rays and gamma rays to pass through the metal. Here, any variations in the thickness or density can be visualized on film. These flaws are typically portrayed as dark areas in the film. These recordings are incredibly useful when needed as a reference for establishing future improvements.
Destructive Testing
On the other hand, we can apply destructive testing to understand the product’s full performance capabilities. This practice is primarily used for the approval of the welding procedure and the welder’s performance. By examining the point of failure of the product, we’re able to gauge how the material will function when put in practice.
Here are some of the most common types of destructive testing methods:
- Tensile Testing: This method is vital to measure how much the sample can be stretched before breaking. In this method, the ends are placed on separate clamps where is sample is gradually pulled apart till a fracture appears. A load cell is attached to accurately measure the amount of force applied during the procedure.
- Fatigue Testing: Besides the strength of the sample, we also need to accurately determine its lifespan. By constantly loading stress onto various points of the sample, the test can simulate the time frame in which fatigue failure will occur. This can be accomplished by applying either high cycle or low cycle fatigue, depending on the stress-induced upon the elastic limit.
- Toughness: Some will argue that this is the most fun method to perform. This procedure will measure how well the sample can withstand an impact. A pendulum is used to hit the metal at a focal point. The damages are reported based on factors such as height dropped, acceleration, and the kickback after making contact.
Final Thoughts
In our society, we’ve taken advantage of luxuries that deliver instant gratification. For welders, they bathe in the self-satisfaction from a difficult task. Most people will only stop to appreciate the exterior of the final product. In comparison, no one will show the same appreciation for the labor needed to establish the interior foundation. Without it, we wouldn’t have products such as skyscrapers, boats, planes, etc. That’s why, as a welder, you must establish a strong base.
To reiterate, these 5 reasons do not cover all the reasons that your weld keeps breaking. Our goal is to showcase a few of the common issues to help guide you in the right direction and improve your troubleshooting prowess.
Welding, while a highly-lucrative career, is highly underappreciated to the general masses. Let’s look at a high-performance car. Many will complement the decal and performance speed. But those same people will not take the time to understand the intricacies behind its design.
But if you’re reading this piece, then you’re not seeking compliments from others. No, the satisfaction stems from the self-acknowledgment of a job well-done. Remember, passion is only as strong as the steps taken to improve and learn. Without it, the progression towards mastery will not come easily.