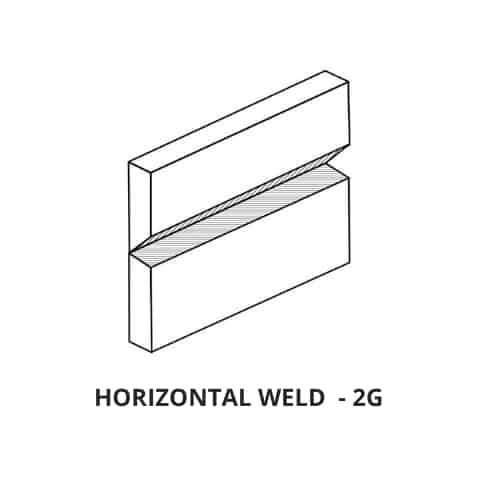
In many welding industries, there are codes and standards for welding to ensure that the finished product is safe and structurally sound. Employers may ask what kinds of certifications you hold and from who the certification was received. These certifications require creating welds in certain positions to a specific and often demanding set of standards. It is these positions to which the 2G refers.
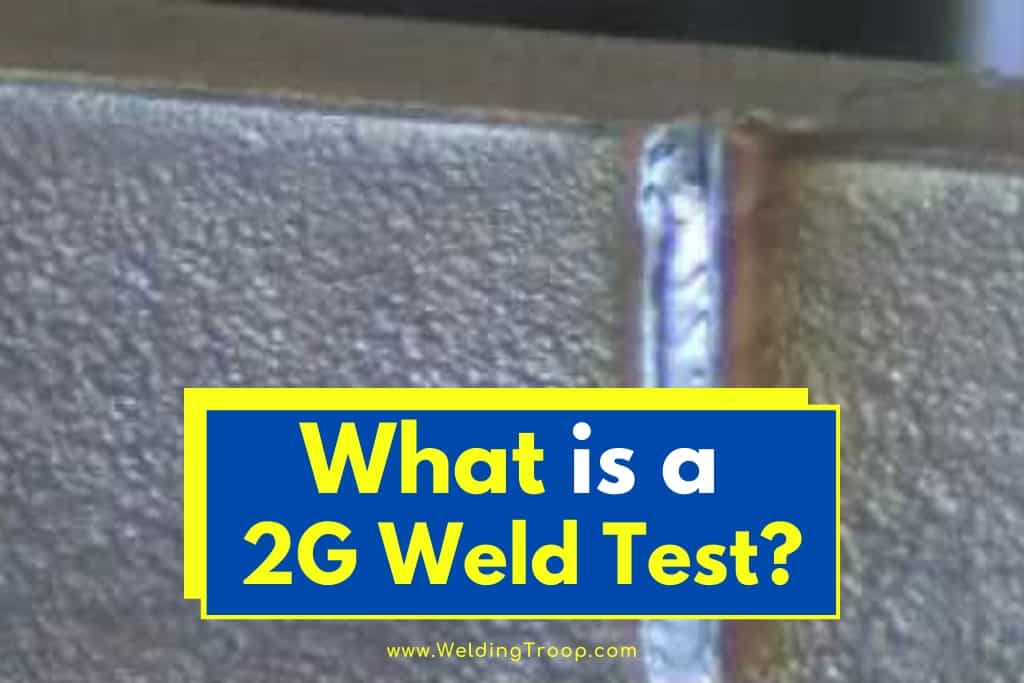
What is a 2G weld test? A 2G weld test checks your proficiency at producing welds that meet specific criteria for the finished weld and includes:
- Welding two horizontal beveled plates
- Proper setup
- Making the weld with or without a backer plate
- Passing a final review or other tests
Understanding the requirements and methods for producing a certifiable weld is an important starting point for taking and passing a welding certification test. While the actual practices and techniques vary, some necessary steps will ensure a successful certification test. Read on to find out what you need to know.
Table of Contents
Preparing for the 2G Weld Test
The first thing that must be understood is that nothing substitutes for practice. You can read all the manuals and books and listen to all the advice you want, but until you start producing welds and practicing those skills, you cannot develop the expertise to produce certifiable welds consistently.
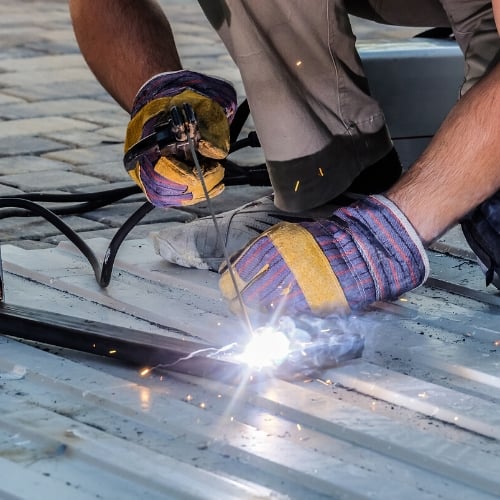
Once you have the basic knowledge of how to produce a certifiable 2G weld, you should prepare some test material and go to work. Find an experienced welder to look at the finished product and give you feedback on what he or she sees, then practice some more. Welding is as much as an art as it is a science, and some things only come from experience.
Related reading: Is Welding Easy to Learn? A Beginner’s Introduction
The 2G Test
The 2G test is a standard welding test for both pipe and structural steel welding. A 2Gtest will require you to weld a horizontal workpiece prepared by beveling the edges where the weld will occur. Prepping the material is as important as the welds. Without proper preparation of the surfaces to be joined, the weld may fail the quality checks at the end of the test.
- Clean the area to be welded thoroughly – Don’t just clean the bevel cut area. You should clean an area at least two to three inches on each side of the bevel. Any kind of contaminant in this area can cause your welds to be inconsistent.
- Inspect the bevel – Look at the bevel on each piece of material. The bevels should be clean, even, and straight. If the bevels are not even and straight, it will be difficult to create an even and consistent fill in the bevel, making the integrity of the weld suspect.
- Sand the material – sanding the material along the bevel will remove any milling scale that may have accumulated. Adding this scale to the weld can cause bubbles or other imperfections in the weld that will affect its structural integrity.
Performing the Welds
It doesn’t matter what techniques you use to lay down your welds. The important things to remember are the correct order in which the welds are laid down and the intermediate steps that should be taken between each successive weld to ensure the finished product meets standards and expectations.
- Set up for the weld by following the instructions that are given to you by the inspector or whoever is administering the test. You should have two pieces of metal and a backer bar.
- Take your time and follow the directions exactly. How well you set up and meet the requirements for the position of each part of the test can be as important as the quality of the weld.
The First Pass
- The first welding pass is called the root weld. This weld should tie all three pieces of metal together. When this welding pass is completed, the two beveled plates and the backer bar should essentially be one unit.
- Wire wheel the weld to remove any scale or splatter that may have occurred. Don’t quench or cool the test piece with water.
Add the Stringer Beads
- Add two stringer beads to the weld. Don’t try to fill the grove with these passes. You should leave about 1/16th of an inch in the groove between the face of the weld and the surface of the test piece.
- Wire wheel the weld again to make sure that any splatter or scale is removed. You can let the workpiece air cool for a bit before proceeding.
The Third Pass
- Add a third stringer bead to fill the gap. This is called the cover pass and is the finishing pass for your weld. Take your time and make sure that the beads are consistent along the length of the weld.
- Let the plate cool until you can touch it comfortably. Inspect the weld. If there are any gaps or low spots, add another stringer bead to make the weld even and level along its length.
Related reading: The Process of 4G Weld Testing – How To Pass 4G Welding Test?
The Inspection
Once you have completed your weld, an inspector will conduct whatever tests are required to determine if your weld meets the specifications of the test. This can range from a simple visual inspection by the test administrator to more involved testing such as
- Bend testing
- Radiographic x-ray examination
- Liquid dye penetrant testing
- Other stress tests
What is the Difference Between a Fillet Weld and a Groove Weld?
In short, the difference in fillet welds and groove welds is the position of the two pieces of metal that are to be joined by the weld in relation to each other.
A fillet weld is made on two pieces of metal that are perpendicular or at an angle to each other. This includes joining one piece of metal to another piece of metal at an angle along the surface of one of the pieces of metal. Lap joints are also considered fillet welds
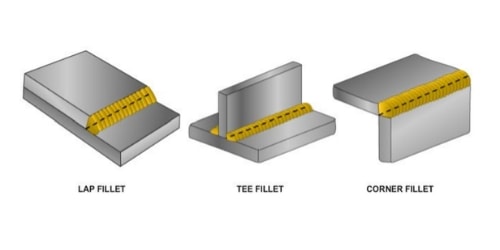
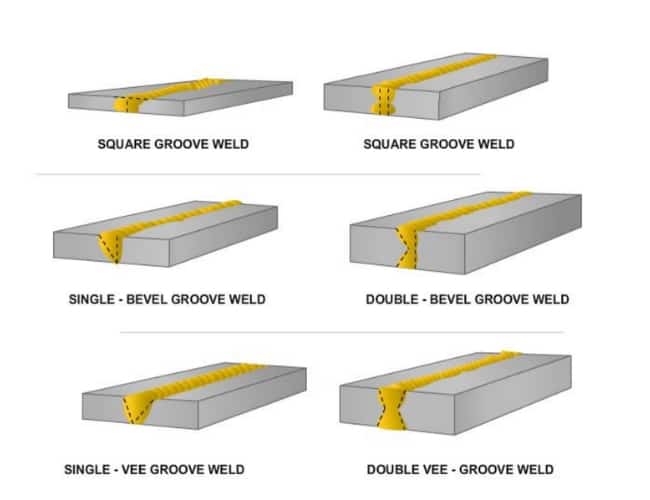
Groove welds are those where two workpiece edges are joined along the length of the two edges. The weld is made in a channel, or groove, that runs between the two pieces of metal. Usually, a bevel is machined onto one or both edges to be groove welded.
Is There a Difference in the 2G Pipe Welding Test?
Pipe welding is a bit of a different animal. The 2G test for pipe welding is done on a test piece in the vertical position. This makes the weld a horizontal weld. There are several key differences in a 2G pipe weld test and a 2G structural weld test.
- No backer bar is used in a 2G pipe weld test.
- The pipe cannot be rotated as the weld is applied. The material being welded must remain in a fixed position.
- 2G pipe welding may involve welding much thinner material that in a structural 2G weld test.
How Much Does It Cost to Get Certified?
There is no hard and fast answer to this question. The cost of getting certified depends a lot on several factors.
- Where and who is doing the test.
- The type of test you are taking
- The number of certifications for which you are testing
In general, testing conducted by an accredited welding school or test facility can cost from $143 to $299 or more. There may be additional costs for the use of welding equipment and supplies as well.
Related reading: How Much Do Welding Courses Cost?
One option to consider is to take a welding class at a local community college or vocational school. The costs for these classes are usually quite reasonable, and some include at least one certification test as part of the course. There may be small charges for test materials and for the weld testing, but these are negligible. The upside to this is the oversight and instruction you get from a trained instructor.
Related reading: How To Become A Certified Welder In California? – All Facts
Getting Certified
Welding is no longer just another task in a metal shop. With the technological advances in welding machines and techniques, welding has become a highly demanding field that requires constant study to stay abreast of the latest changes and new techniques.
Becoming a certified welder is the first step in being recognized as a professional welder. Those certifications can open doors and provide opportunities.
Related reading: What Is the Difference Between Welding and Fabrication?
2G Stick Plate Welding 101 with Back Grind >> Check out the video below