Welding aluminum is considerably more straightforward than you may imagine. Welding is the process of bonding metal together with heat applied at a temperature high enough to melt and fuse the metal. Since aluminum is thinner than stainless steel (and, therefore, more likely to burn a hole through), the process must be done carefully and slowly.
Follow these steps to weld aluminum at home:
| Steps | Actions required |
|---|---|
| 1 | Polish with a brass brush or sandpaper to remove oxidation. |
| 2 | Secure your aluminum |
| 3 | Get heat source to 730-degrees Fahrenheit (melting point of aluminum). |
| 4 | Use brazing rod to poke the aluminum gently |
| 5 | Create desired shape or linkage |
| 6 | Don’t touch until cooled |
A proper weld is achieved by understanding the chemistry as well as you understand the technique. Even if you’ve welded with stainless steel before, the process will be different with aluminum.
Use this quick read to learn the steps to weld aluminum at home, understand your material, how to manipulate it, as well as some creative ideas to get you welding!
Before you continue reading, here is an article we wrote about how long does it take to learn welding and here are the highest paying welding jobs.
Table of Contents
How to Weld Aluminum at Home
There are so many aspects and details within the skill of welding. With entire books on the subject and courses that take welders years to hone their skills, we are not expecting you to be an expert welder overnight,
but the necessary steps for welding aluminum are as follows:
| Steps | Actions |
|---|---|
| 1 | Gather your pieces of aluminum |
| 2 | Polish them to remove all oxidation, using your brass brush or sandpaper. Do so thoroughly to avoid debris inhibiting a clean weld line |
| 3 | Connect the two pieces (if using two) securely and be sure there are no gaps before you are ready to weld. You want a clean line that is firmly fused, so fit them snuggly |
| 4 | Place a ceramic tile on either side of the aluminum, almost like a grip around the aluminum, over which you can tighten the grip vice. |
| 5 | Clamp the needlenose pliers tightly around your brazing rod |
| 6 | Start to heat your aluminum but pull the fire away intermittently |
| 7 | Poke the aluminum gently with your brazing rod (held securely by your needle nose pliers). If you poke it and nothing happens, it’s not hot enough yet. The temperature you’re seeking to reach is around 730-degrees Fahrenheit (390-degrees Celsius). If you have reached this temperature, you will poke the aluminum with your brazing rod and see a puddle of aluminum start to emerge. In essence, this means the aluminum is hot enough (and able to be manipulated). For example, if you were welding two pieces of aluminum together, you would take your rod straight down the line that runs between the two separate pieces. You would heat it, poke it, then allow the puddled metal to cool off as one linked piece. When the aluminum is hot, this is the only time you will be able to maneuver it into the desired shape you are planning |
| 8 | After you have influenced the material to your desired joint or separation, don’t touch your aluminum yet as it’s likely still over 500+-degrees Fahrenheit. Even though you still have gloves on, avoid handling it |
| 9 | With many welds, you will take your creation and drench it in cool water to solidify the weld. However, with aluminum, this is not required. You do not need to dip your creation in water; simply allow it to cool independently and avoid touching it for a couple of hours |
Understanding Your Selected Material
Every material that you weld will come with its list of unique requirements, hindrances, and limits.
A few key points to help you understand aluminum a bit more are:
- It has a higher point of conductivity than stainless steel.
- It has a significantly lower melting point than stainless steel (around 1,200-degrees Fahrenheit for aluminum and closer to 2,500-degrees Fahrenheit for steel).
- It’s more reactive to oxidation and exposure to the air.
- This oxidation layer is like a shield of armor around the aluminum. Its melting point will be closer to 3,700-degrees Fahrenheit and protects the aluminum from corrosion.
- While working, you must be aware of the oxidation layer and its insulation since it will inhibit your welding ability. Because of this, you will need to:
- Brush it off before your weld
(And possibly)
- Brush it off during the welding process (if you notice that the oxidation layer is separating from the actual aluminum).
This is because the oxidation and melting point of that top layer is sometimes faster to melt than the aluminum itself. You will use a wire brush or sandpaper to clean your aluminum beforehand and possibly in the middle of working. The oxidation layer must be removed to get a clean weld.
- Your aluminum will become stronger the more you weld; conversely, steel will not.
- Your aluminum will require a welding machine with a higher amperage (or voltage), as this will create a faster speed. Opposingly, with steel, it is less easy to ‘burn through’ the material because it is so much thicker than aluminum.
What You’ll Need
The main items and requirements for a basic aluminum welding project will include (but are not limited to):
| Nr. | Items & Requirements |
|---|---|
| 1 | Welding Helmet |
| 2 | Leather Gloves |
| 3 | Goggles |
| 4 | Brass Brush or Sandpaper |
| 5 | Heat Source |
| 6 | Arc Welder Inverter Machine |
| 7 | Brazing Rod |
| 8 | Needlenose Pliers |
| 9 | Ceramic Tile (Optional) |
- Welding Helmet
- Leather Gloves – These are the standards of safety for welders.
- Goggles – That are specifically for welding or can withstand close extreme heat.
- Brass Brush or Sandpaper – Useful for cleaning the oxidation off of the aluminum before you begin to weld. Once used on the aluminum, keep it for that purpose and always use a clean brush.
- Heat Source – Mat gas burns slightly hotter than propane and heats up more quickly, but you can use propane as well.
- Arc Welder Inverter Machine – Your heat source, (search for one with high power and voltage which will be required for aluminum), or a Blow Torch (Welding Rod).
- Brazing Rod – Rod used for welding details, almost like a painter’s brush.
- Needlenose Pliers – To hold the blazing rod in place and add control so that you don’t have to hold the blazing rod in your hands.
- Ceramic Tile (Optional) – This is to place between the vice (which will hold your aluminum piece), and the ceramic tile will hold the aluminum into place. The purpose is to create a heat barrier in which the aluminum is targeted by heat (the ceramic does not absorb heat), and therefore, the vices do not overheat. This keeps the heat centered on the aluminum. You can use any material that is not a conductor of heat.
Final Tips for Beginners
Again, it may take years to dive fully into the intricate art of welding; nonetheless, we all know that practice makes perfect! A few tips for your first practice project are:
- Be careful to move slowly – You want to avoid cracking the aluminum which can occur as the product cools and your welding is solidified. Moving slowly will keep the material at a state that is strong enough to withstand the fluctuating temperatures more efficiently.
- Keep in mind that aluminum is:
- Much more conductive than steel
- Susceptible to separating or not accepting the penetration of your weld
- Going to require more heat than steel
- Research your filler material – If adding any other type of metal or material into your creation, be sure before you begin welding that you understand the:
- Melting point
- Weaknesses
- Compatibility with aluminum
You don’t want to ruin your aluminum project, so confirm beforehand that the two materials will work together.
- For storage, keep your creation indoors to protect it from moisture, mold, mildew, etc.
Before you continue reading, here is an article we wrote about 8 Reasons Your Aluminum Welds Are Black – How to Avoid Them
Ideas for What to Weld from Aluminum
Lastly, to inspire you, have you already dreamt about what you plan to weld using aluminum? Aluminum that has been welded is commonly used for cryogenics and natural gas transportation (likely not what you’ll be doing around the house).
A few ideas for welding with aluminum around your home are:
- You could have a household item made of aluminum (including appliances, piping, etc.) that needs renovation.
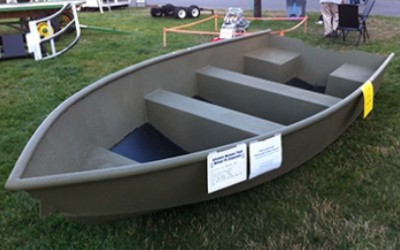
- A Boat
- A Table with an aluminum base. You could also leave the top open for a piece of glass to set on top for a stylish finish.
You are only limited by your imagination. Have fun and experiment because the more trial/errors you experience, the more skillful you will become!
In Conclusion
Aluminum will have a completely different reaction to welding than typical steel materials, so don’t enter into the process with preconceived notions. Aluminum will require a higher heat index than steel and is prone to cracking if you rush it.
Weld patiently, wear proper welding protection (including goggles to prevent Welder’s Eye), and you should have a beautiful creation in no time!
More Welding Articles
Easiest Way to Learn Welding and How Long Does It Take?
Can Steel and Aluminum Be Welded Together?| All You Need To Know
What are the Advantages and Limitations of Plasma Arc Machining?
Is Welding a Hard Job? | All Facts You Need To Know
Aluminum MIG Welding >> Tutorial video