When people weld, they work to combine two types of metals or alloys by melting those metals together, or by using a filler material that comes out of an electrode or wire. Welding first became popular during the 19th century, and it became a hit in the vehicle manufacturing, steel, and shipbuilding industries.
What tools and equipment list do you need to get started with arc welding? If you want to begin arc welding, there is a variety of tools that you will need to purchase, including:
| Nr. | Tools & Equipment List |
| 1 | An arc welding machine |
| 2 | A power source |
| 3 | An oxy-acetylene Setup |
| 4 | Electrode holder and cables |
| 5 | Electrodes |
Since there isn’t much information on the Internet today covering what tools you need to purchase to get started with arc welding, we created this article to help you out.
Below we’ll include an essential buying guide list of the products you’ll need to purchase to start arc welding.
Once you read our guide, you’ll know what you need to buy so you can begin your journey into the wonderful world of welding.
Table of Contents
Welding Basics
To understand some of the products you’ll need to buy so you can start welding, we’ll first explain a few welding basics to you so that you’ll have a more robust comprehension of how these tools work together.
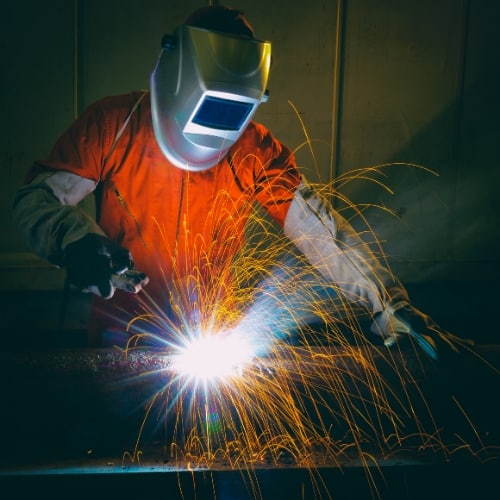
Most welders complete their jobs by making an arc (hence the name arc welding) between the electrode and the base metals. The electrode creates the heat and helps either combine the metals themselves or by the use of filler material.
If you want to make the most precise, useful and reliable welds, then you’ll need to have the proper equipment to compete in the industry. With the right equipment, you’ll be creating high-quality welding products in no time.
Within the industry, everybody is always trying to improve their welding techniques, so you’ll also need to spend plenty of time practicing, even after you learn how to weld correctly.
However, first, you need to have the right equipment, which we’ll walk you through below.
Arc Welding Tools and Equipment List
So, what tools do you need to start arc welding? You’ll need to purchase the following tools, which we’ll cover in more detail:
- An arc welding machine
- A power source
- An oxy-Acetylene Setup
- Electrode holder and cables
- Electrodes
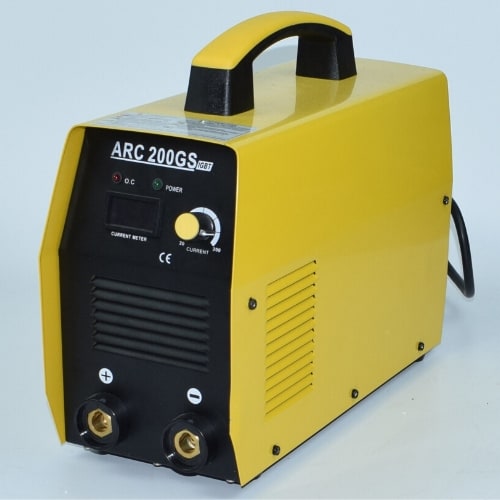
#1: An Arc Welding Machine
An essential product that you’ll need to purchase is an arc welding machine, which will also probably wind up becoming the item on which you spend the most money.
A welding machine, also sometimes called a welder, works to create the electric current you’ll need while you weld. Most welding machines come in two categories:
- CC, or constant current welding machines
- CV, or continuous voltage welding machines
So, what’s the difference between these choices? A CV machine alternates how much output current it creates to keep a constant voltage. On the other hand, a CC machine will vary its output voltage and keep a steady flow.
When selecting a welding machine, you’ll need to consider the following features of the machine carefully:
- The duty cycle
- Voltage power
- The AC/DC settings
You need to take a close look at these features because you’ll need to know how much energy you’ll need for the machine.
You’ll also need to ensure that you have enough time to use your device to get your welds done, which is why knowing the duty cycle of the machine is so important.
Welding Brands
If you’re new to the welding industry, you probably are wondering what the best brands are when you are investing a few hundred dollars into a welding machine.
While there are many affordable welding machines on the market, the most reliable welding machines are typically priced between three hundred and six hundred dollars. Also, the top brands in the welding industry are:
- Miller
- Lincoln
- Hobart
3 Key Welding Types: TIG, MIG, or Stick Welders
Besides the brand of welder you want to purchase, you’ll also need to think about the type of welding you’re going to be performing.
You’ll have the opportunity to choose between three types of welding when it comes to buying an art welding machine. Those three types of welding include:
- TIG welding
- MIG welding
- Stick welding
Each type of welding requires a different skill set. However, choosing what kind of welding you want has a lot to do with cost and portability. Of course, your budget will also play a key role when it comes to selecting your type of welding machine.
So, what is TIG welding? Using TIG welding, you can create quality, clean welds. However, learning the art of TIG welding isn’t easy. TIG welding is one of the hardest types of welding to learn.
On the other hand, MIG welding is much easier to learn and use. However, it’s not that cost-effective, and you also won’t have the portability with MIG welding like you would if you were to use a simple stick.
What is TIG Welding? (GTAW) >> Check out the video below
MIG welders usually use a feed wire to perform their welds instead of using rods. In MIG welding, the wire comes from a feeder and then to a torch that has a tip on it.
The cables are typically metal, so you’ll need to shield those metal wires when you use your inert gas. If you don’t, you won’t be doing much to protect your weld from any excess air or moisture, which winds up in a poor-quality weld.
What is MIG Welding? (GMAW) >> Check out the video below
MIG machines are prevalent since they are easy-to-use and offer many advantages.
For example, you can use a MIG machine for a lot longer time than you can a TIG or stick welding product. However, if you’re looking into affordability and portability, then you may want to consider TIG and stick welding.
#2 Power Source
The next item you’ll need to purchase is a welding power source. Welding power sources help to give enough power to the welding machine or welding stick so that you can melt your metal pieces together.
That power source also needs to be able to create a current for melting your electrode when you weld metal pieces together. So that means your power source also has to have a high voltage capability so that it can keep the arc going.
If you are using an MMA electrode (and we’ll talk more about electrodes later), then you’ll need to use that electrode with a combination of an alternating current (AC) and direct current (DC) power sources.
You can utilize AC electrodes on a DC power source. However, you cannot use all DC electrodes on an AC power source. So, regardless, you’ll need to have both sources of power to conduct proper welding.
Electrodes and High Currents
MMA electrodes need strong currents but low voltages to operate. So, if you wind up using a higher voltage supply, you’ll need to take down that supply through the help of a transformer.
If you’re also going to create a DC power supply, you’ll have to ensure you have that output and that it can also be used with the transformer.
Most power supplies are designed to reduce the risk of receiving an electrical shock while you are working. Because of that, most power sources have to work well using a maximum no-load voltage.
That means no arc can be created when you have the external circuit open, and the power leads connected to the power source.
Learn More About Welding Rods – Here, you can find an article from our website: What are the Different Types of Welding Rods and Their Uses
So, your power source needs to have a hazard reducing device on it that’s either internal or external. That device will help bring down the no-load voltage and prevent you from experiencing any electrical shock.
You’ll need to create the primary welding current once your electrode starts touching the piece of metal. If you weld in smaller spaces, using DC or AC with a low voltage safety device will keep you very safe while you work on your welds.
There are four different types of power sources you’ll need to use when you weld:
- DC Generator
- DC rectifier
- AC transformer
- AC/DC transformer
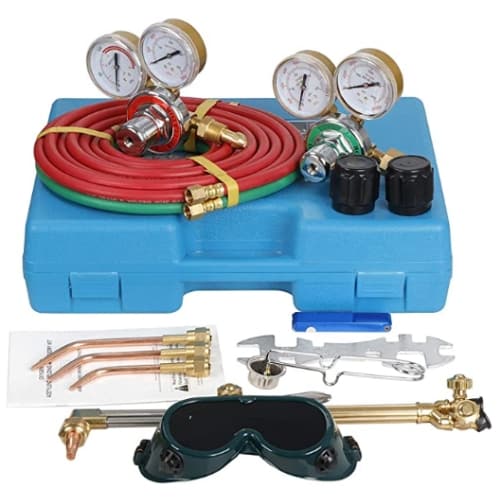
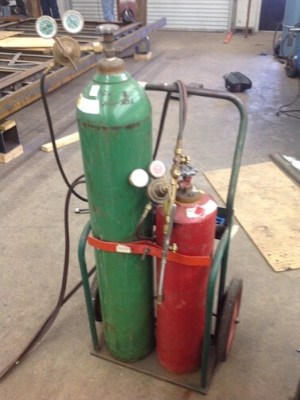
#3 Oxy-Acetylene Setup
You’ll also need to make sure you have an oxy-acetylene setup when you get started with welding. Oxy-acetylene is used in many welding processes, including:
- Forming
- Cutting
- Bending
- Hardening
- Tempering
- Pre-heating
- Post-heating
- Braze welding
- Brazing
Using an oxy-acetylene setup will give you the control you need over the heat input while you build your puddle. You’ll also wind up being able to better control the size and shape of the beads you use to combine your metal pieces.
Oxy-acetylene gives welders a way to make precise welds because of the large amount of control this setup provides to the welder.
Using an oxy-acetylene heat input allows the welder an exactness while using this high-temperature flame. Plus, this equipment is very affordable, and will let you have plenty of portability when you weld.
Welders use oxy-acetylene for many reasons. These include:
- the low cost of oxy-acetylene setup equipment
- the simplicity of using this welding equipment, and
- this welding equipment’s portability
People have used oxy-acetylene setups for numerous years. You won’t ever see a welding shop operate without an oxy-acetylene torch because of the importance of having this equipment around while you weld.
For example, if you need to cut perfect circles into a piece of metal, it’s quite easy to do this using your oxy-acetylene setup. The precision you’ll get with this equipment is nothing less than remarkable.
As long as you follow the safety precautions of welding, you should be fine. However, one disadvantage of the oxy-acetylene setup is that it tends to be the most dangerous piece of welding tools that most welders work for.
With an oxy-acetylene setup, you’ll be able to cut through steel. However, oxy-acetylene can’t cut through the following metals:
- Stainless steel
- Aluminum
Even though the oxy-acetylene setup does tend to be dangerous, as long as you use it properly, you should be fine. Also, it’s a fundamental tool that you’ll need because you can do almost anything you need to do with metal using an oxy-acetylene setup.
It’s straightforward to cut, bend, and weld things together using an oxy-acetylene setup.
You can purchase an affordable oxy-acetylene setup for around two hundred dollars. There isn’t much out there that produces more heat than an oxy-acetylene flame.
The only items in existence that create higher temperatures than an oxy-acetylene flame are:
- The sun
- Nuclear explosions
- Welding arc plasma
#4 Electrodes
If you’re going to get serious about welding, you’ll also need to purchase a welding electrode. Electrodes are tips that you place into one end of your welding tool. Then an electric current comes from the power source, and that’s moved into the material.
Depending on what type of welding you are performing or what you are doing, you may need different electrodes for different operations.
Nowadays, you’ll find different electrodes that can be used for each of the traditional welding processes.
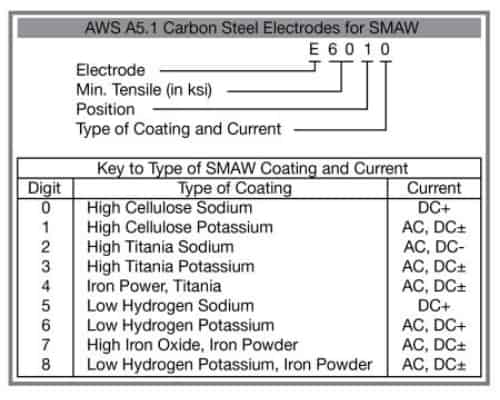
For example, if you’re performing SMAW or shielded metal arc welding, then you’ll need a consumable electrode that you melt so that you can create your weld joint. Some popular models of these electrodes include:
- The E6010
- The E6011
- The E6013
- The E7018
Each one of these types of electrodes above is some of the most popular ones utilized for the various arc welding processes.
MIG Welding
In MIG (metal inert gas) welding, you’ll need a consumable electrode wire. That wire is typically fed through using the welding torch. You need to purchase the wire in certain thickness.
The most popular electrode sizes for MIG welding include:
- The .023
- The .030
- The .035
- The .045
However, if you are working with thick, large pieces of metal, then you may need to use a thicker wire than what we’ve listed above.
TIG Welding
TIG (tungsten inert gas welding) is done using a non-consumable electrode as well. However, in TIG welding, the most popular types of electrodes to use are:
- Ceriated electrodes
- Lanthanated electrodes
We recommend that you avoid using the TIG electrode type known as a thoriated electrode.
Unfortunately, while thoriated electrodes are used in TIG welding, they also produce radiation as you work, which creates many health problems. So, avoid them and select a different type of electrode.
Learn More About Welding Rods – Here, you can find an article from our website: What are the Different Types of Welding Rods and Their Uses
Unlike the electrodes that are used in MIG welding or SWAW welding, the electrodes used in TIG welding are made out of non-consumable tungsten.
So, in contrast to SWAW and MIG welding electrodes, you don’t frequently need to replace your TIG electrodes. That’s because TIG electrodes last much longer than SWAW and MIG welding electrodes.
Choosing the Right Stick Electrode >> Check out the video below
Consumable Electrodes
Consumable electrodes are traditionally comprised of metals like:
- Nickel steel
- Mild steel
While it sounds like the electrode will disappear while you weld if it’s consumable, the consumable electrode is still not typically used up during the entire welding process.
That’s because consumable electrodes are designed not to melt.
Electrodes are not an expensive product to buy. They typically cost around twenty dollars.
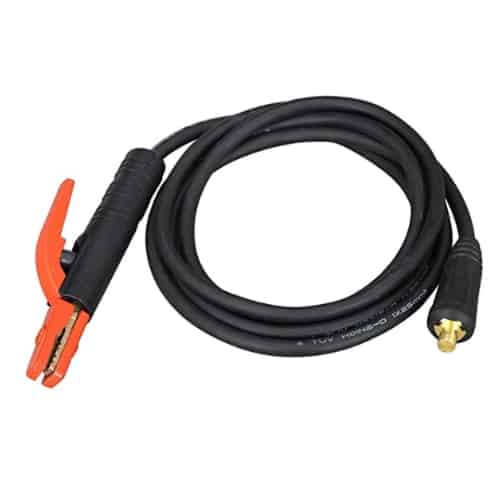
#5 Electrode holder and cables
Since you’ll be working with electrodes, you’ll also need electrode holders and cables. An electrode holder will help clamp your electrode’s end with copper that’s built into the head of the holder.
The shoes that are found in the head area are then held together using a spring-loaded system or a twist grip. The clamping tool that holds the electrode will then quickly let go of the stub end.
The electrode must stay clamped into the holder to make the entire process efficient. If you don’t clamp the electrode into your holder, you’ll wind up with low-quality electrical current, and that can make your arc unstable and undergo arc fluctuations.
Both of these issues would result in a poor quality weld.
You’ll also need to take welding cables and connect those to your electrode holder as well as your power source. These cables are usually crimped mechanical or soldered to withstand the currents running through them.
For proper welding to take place, you’ll need to keep consistent connections between the following:
- Your holder
- The electrode
- Your cable
If you don’t pay attention to the connections, then you’ll wind up with poor connections. Poor connections create problems with resistance heating.
Furthermore, poor connections can also result in a slight arcing within the torch itself, and that can make the holder itself malfunction and overheat.
To avoid all of these issues, simply make sure your connections are both reliable and secure. We’ll describe how to do this to help you out.
- Connect two cables to your power source output.
- Next, place your welding lead into the electrode holder.
- After that, clamp the current return into the workpiece.
(Many people call the clamp current an “earth lead.”). Regardless, you’ll need additional and separate earth lead if you want to protect yourself from any problems with your power source.
So, if you purchase an earth cable, you’ll need to make sure that wire can hold the maximum output that your power source can create. If you don’t do that, you may wind up with a poor-quality weld, or a melted earth cable, depending on the earth cable’s quality.
Most earth cables come with a special covering that’s protective, rubberized sheath. This sheath is flexible and smooth and helps to protect the cable from the electricity traveling through it.
Plus, this coating also resists oil and water and helps to insulate the power at voltages that are less than 100V DC. How large you need your cable to be will depend on the welding level that you use.
If your duty cycle and current are higher, then you’ll need an earth cable with a larger diameter. The larger diameter is necessary to ensure that the wire won’t overheat while in use.
You may also need a larger diameter of wire if you weld far away from your power source.
Now you should have a better idea about the tools and equipment list you would need in order to start with arc welding.
Sources:
sciencing.com
American Welding Society (aws.org)
Recommended Reading
5 Key Advantages of Arc Welding Over Gas Welding