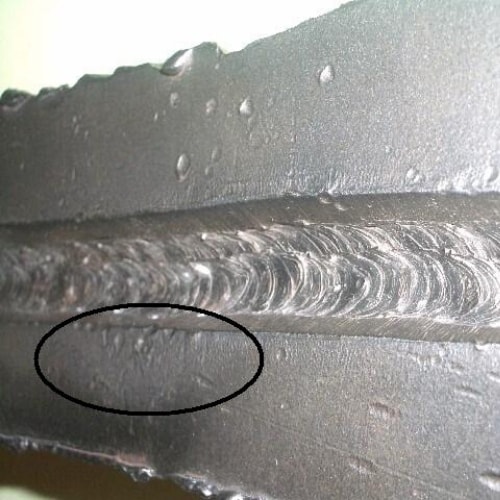
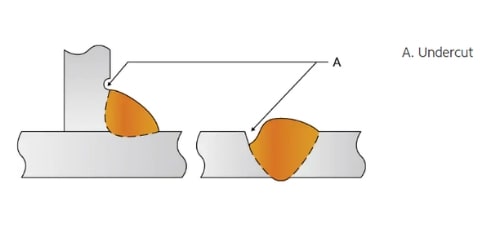
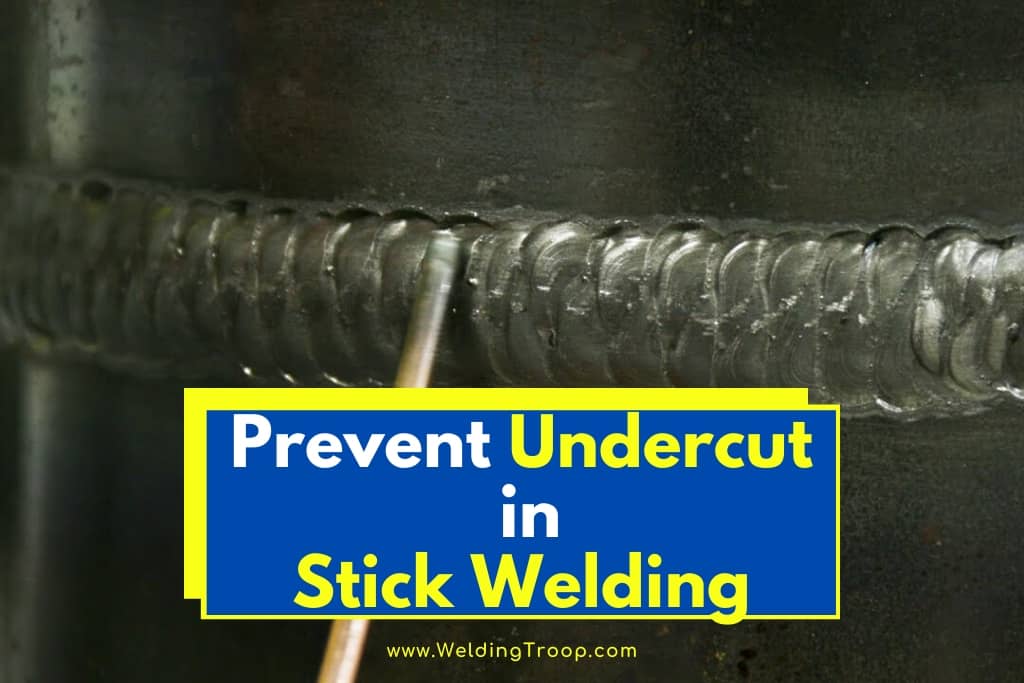
Undercutting is one of the most common mistakes made by welders, particularly beginners. You never really stop learning how to improve your welding abilities, though. Here you will learn how to prevent undercuts in stick welding.
How do you prevent undercut in stick welding? There are 12 golden tips to prevent undercut when you are stick welding. Here they are:
- Control Your Arc Length
- Control Weld Angle
- Reduce Current
- Slow Down the Travel Speed
- Reduce the Weave Width
- Choose the Correct Welding Position
- Consider Which Electrode You Are Using
- Allow the Base Metal to Cool
- Pause at Both Sides of The Weld Puddle
- Make Sure You Are Comfortable
- Make Sure You Can See What You Are Doing
- Take Special Considerations When You Are Welding Pipes
If you follow these 12 golden tips, then you should be able to prevent future headaches caused by undercutting in welds. Hopefully, you can learn something you didn’t know before reading this article.
Table of Contents
1. Control Your Arc Length
One of the more common errors that beginner welders make is controlling their arc length. Arc length refers to the distance between the base metal and the electrode tip. Operating with an electrode that is too far from the weld puddle will contribute to increased spatter and undercut.
Related reading: The Problem with Weld Spatter – and How to Stop It
There is no uniform arc length to adhere to when stick welding, but there are certainly some tried and true guidelines to follow.
The preferred arc length depends upon specific electrode type and the application (i.e., welding cast iron vs. welding mild steel). A general rule-of-thumb is that arc length should not exceed the diameter of the metal (non-coated) portion of the electrode.
If you were welding with a ⅛ inch diameter E6011, then you would want to keep your welding rod to be roughly ⅛ of an inch away from the base metal. Hold a ruler vertically against a surface and you get a good idea of how close to the base metal your welding rod really needs to be.
The arc length recommendations are as follows:
- If you are using 1/16 or 3/32 inch electrodes: Arc length should be 1/16”
- If you are using ⅛ or 5/32 inch electrodes: Arc length should be ⅛”
Keeping the arc length under control is of particular concern when you are using a low-hydrogen electrode such as the E7018. You will know that your electrode is too far from the base metal because you will be able to hear an electrical humming sound.
You will also observe the slag wanting to “explode” from the weld puddle in the same way that olive oil explodes out of a frying pan when the stove heat is too high.
The sound of a proper arc length has been described as the sound of bacon frying in a pan.
Related reading: 11 Common Welding Defects and How to Prevent Them
2. Control Weld Angle
Hand in hand with arc length is the motion of travel that the electrode should be directed to take. In stick welding, the electrode is typically directed back toward the molten pool.
This method of travel is known as backhanded welding. In all positions, the ideal weld angle is generally 10 to 30 degrees.

The drag angle has a more significant impact on the appearance and strength of the weld than many welding operators realize. An improper drag angle is one of the leading causes of undercut.
Related reading: The 8 Strongest Types of Welds
It is easy to visualize why drag angle is so important if you can watch someone who is purposely welding at a bad angle.
This video below shows how dramatic of an effect changing the drag angle can have on the quality of the weld.
Angles for a Good Arc Weld >> Check out the video
3. Reduce Current
The current also has a significant effect on the condition of the weld bead. Too much or too little amperage from the welder will contribute to a weld of poor quality, typically marked by the telltale occurrence of undercutting.
I recently wrote an in-depth article about Stick Welding: Ultimate SMAW Guide, have a look at it.
Ensure that the current traveling to the electrode is correct by properly adjusting the amperage on the welder prior to starting the welding process. The required current will depend largely upon the diameter of the electrode that you are going to be using. Small diameter electrodes require less current than large diameter electrodes do.
As always, the best way to know the welder settings that will work best with your electrode selection will depend upon manufacturer recommendations.
Related reading: What’s The Difference Between AC And DC Welding >> AC vs. DC
4. Slow Down the Travel Speed
Undercutting often occurs when the operator is dragging the electrode along at a speed that is too fast. You will be able to tell when you are directing your electrode at a pace that is too rapid because you will also notice cracking, shallow penetration, excessive spatter and porosity.
A good travel speed for stick welding is 3 to 6 inches per minute. While it is difficult to get travel speed down to a precise value, you should be able to get a good feel for the correct travel speed. If anything, you are probably going too fast rather than too slowly. A travel speed that is too slow will feel like a painfully slow crawl. A moderate travel speed is preferred.

Also, of importance is the avoidance in the variation of travel speed. Keeping travel speed uniform over the course of a weld is a critical part of creating a weld that not only looks clean but is also strong. This is actually harder than you may think because the welding process involves the welder reacting real-time to the different challenges presented by each welding project.
If you have been having issues with the qualities of your welds, you are encouraged to practice your own little experiments. Do some trials on test pieces of scrap metals while changing parameters such as amperage, arc length and travel speed to get a feel for what works best.
Before you continue reading, here is an article we wrote about the topic: Do You Push or Pull when Stick Welding? | Which is Right?
5. Reduce Weave Width
If the size of the weave is too wide, then undercutting is likely to occur. You do not want to force your electrode too far out of the projected straight line of travel. If you do so, you are creating a larger square area at the weld zone that must be filled by deposited filler material.
The electrode will often not be able to lay down enough filler material to cover the entire area of the base metal that has been penetrated by the electrode. This is how undercutting occurs. A general rule-of-thumb for weave width is that the maximum weave width along the line of travel should not be any more than 3 inches greater than the diameter of the electrode itself.
If you have an electrode that is ⅛” inches in diameter, then you will not want to lay down a weave that is greater than 3 ⅛” inches in diameter.
6. Choose the Correct Welding Position
Welding with the wrong position for the specific application can also cause undercutting to occur. Some stick electrodes can only be used in select positions while others can be used in all positions.
There are 4 types of electrodes for the different welding positions in stick welding, as classified by the American Welding Society:
- 1- All Positions
- 2-Flat and Horizontal Positions
- 3- Vertical Position
- 4-Flat, vertical down, overhead and horizontal positions
The classification number on the side of stick electrodes will tell you which position the electrode is compatible with. For example, the E6013 electrode has a “1” in the third digit, which means that the electrode can be used in all positions.

7. Consider Which Electrode You Are Using
Even if you are using the electrode in the correct position, you may still encounter issues with undercutting that are a result of electrode selection. Some electrodes are naturally more prone to undercutting than others. While stick electrodes that are deeply penetrating are necessary in many applications, the operator needs to understand the challenges posed when using such electrodes.
The EXX10 and EXX11 line of electrodes, which includes the E6010 and E6011 electrodes among others, are known for having aggressive, digging arcs. The use of these electrodes leaves the weld site particularly vulnerable to undercutting. This is not to say that you should avoid using them, they are often the best stick electrode for many applications.
However, if you are going to use electrodes known for having a digging arc, make sure that you are especially mindful of your technique. If your arc length is too far or your weave width is too wide, you will almost certainly see some degree of undercutting in your weld.
Related reading: Different Types of Welding Rods and Their Uses
8. Allow the Base Metal to Cool
Not allowing the base metal to cool down a little bit before you make the next pass with your electrode can also cause undercutting to occur. It is recommended that you only weld in small segments. Welding in segments that are too long will cause the base metal to become distorted from too much heat.
You may not find many specific recommendations when it comes to how many minutes you should actually allow the weld to cool between multiple passes.
However, as is instructed in this educational resource, you should allow the weld to cool slowly. The cooling duration will vary depending upon the type of material and the application. Allow at least 5-10 minutes of cooling between passes
Many welders will ask if they can (or should) enhance/speed-up the cooling process by using a fan or other cooling technology. The answer to this question is typically no. It is preferred that you allow the base metal to cool slowly.
9. Pause at Both Sides of The Weld Puddle
There are certainly times when welding requires a little patience. Hesitating at the sides of the weld bead will allow the weld bead to build, helping to prevent undercutting. Undercutting often occurs when the operator has not allowed sufficient opportunity for the filler material to be evenly deposited.
How much hesitation is necessary to allow for the weld bead to build? The key is to allow the weld bead to travel in such a fashion that the arc is in the leading ⅓ of the weld pool. You do want the heat from the arc to be directed towards the weld itself rather than the molten puddle.
Traveling too quickly will create a weld that looks a lot like a bunch of stacked dimes rather than a smooth weave. This happens when the operator directs the electrode at such a quick pace that the electrode escapes the leading ⅓ of the weld pool. The weld pool will then struggle to keep up with the electrode.
10. Make Your Life Easier with A Comfortable Shop Set-Up
One of the biggest risk factors when it comes to running into issues with undercutting is working at a station that is unbalanced. If your welding from on a table or bench that is unbalanced, you will have difficulty operating with the correct direction of motion, maintaining the right drag angle and keeping the weld bead smooth and consistent.
Look for a metal welding bench table that is balanced and sturdy. Some of the most reliable types of welding tables have adjustable legs, such as this Eastwood Steel Adjustable Steel Welding Table. In addition to adjustable legs, the table has three separate slots for clamping and a sturdy 14 gauge played work surface.
You are also encouraged to utilize clamps to secure your work, as necessary. The Strong Hand Tools Light Duty Utility Clamp. Clamps present you with the best chance to keep your workpiece secure. There are few things more frustrating than having your workpiece shift during the welding process. A good clamp will prevent this from occurring.
Related reading: Arc Welding Tools and Equipment List | Buyers Guide
11. Make Sure That You Can See What You Are Doing
Being comfortable while welding also means that you are easily able to see what you are doing. Don’t cut corners when it comes time to get a welding helmet. Modern welding helmets seek to enhance visibility, whether it is through wider lenses or auto darkening lenses.
You can find numerous welding helmets with auto-darkening capabilities. One of the more popular auto darkening helmets is the Monster & Master Large Viewing Screen Auto-Darkening Helmet. Not only does this helmet have auto-darkening features, it also has a larger lens than many other welding helmets, particularly older ones.
Related reading: How To Choose A Welding Helmet: What To Consider
12. Take Special Considerations When Welding Pipes
The E6010 is the preferred electrode for downhill pipe welding. This is because the E6010 electrode is the most deeply-penetrating, all-position stick electrode.
This electrode contains the greatest amount of cellulose within its flux cover. The cellulose provides the weld with a significant extent of gas-shielding capabilities.
The deep digging abilities of the E6010 electrode also make it far too easy to run into undercutting problems when welding pipes with this electrode.
Fortunately, there are many steps that can be taken to make sure that undercutting does not occur when you are using stick welding to perform a weld on a length of pipe.
Take Care When Welding the Root Pass
The root pass is the first weld that is performed on an open joint. Undercutting can often occur at the root pass of a welded point. The way to prevent this from occurring is to not push the electrode in too far when performing the root pass on a pipe.
In general, the following are causes of internal undercut when you are stick welding a pipe:
- Your amperage setting is too high
- The electrode is set too deep into the groove
- The root opening is too wide
- The root land is too thin
The electrode should be only barely touching the root land (or at the top of the root race) or pushed into it slightly during the root pass. While you are performing the root pass, you are encouraged to center the stringer bead to prevent undercut from occurring.
Related reading: How Many Amps Do I Really Need for a MIG Welder?
Remember that a stringer bead is a more straight and narrow bead than the weave bead. Limiting undercutting in stick welding, whether you are welding a pipe or welding sheet metal, means limiting the maximum width of your weave to 3 inches at the most.
If you are welding a pipe, it is preferred that you make your root pass with a centered stringer bead in order to prevent undercut.
During this entire process, you will need to make sure that you are keeping your arc length down. The importance of keeping your arc length down was discussed earlier in this article.
This is especially important when welding pipes with the E6010 stock electrode, since this electrode is known for being an electrode that digs deeply.
How to Fix Undercut on Pipe Root and Cap >> Check out the video below
Here are some of my favorite tools & equipment´s
Thank you for reading this article. I hope it helps you find the most recent and accurate information for your welding project. Here are some tools that I use daily and hope you´ll also find helpful.
There are affiliate links, so if you do decide to use any of them, I´ll earn a small commission. But in all honesty, these are the exact tools that I use and recommend to everyone, even my own family. (NO CRAP)
To see all my of most up-to-date recommendations, check out this resource that I made for you!
Recommended Reading
The Problem with Weld Spatter – and How to Stop It


